Overview
ODMS R8/R7 has been supporting Outlook Web App for Office 365 as webmail support, but due to the
specification change for POP/IMAP from Microsoft, it will no longer be supported after 1 October, 2022. For details, refer to the following article:
If you wish to continue using Office 365 emails, you can do so by installing the Microsoft Outlook
desktop application on your PC and changing the ODMS settings. You will not be able to send
dictations using Outlook Web App for Office 365, so please change the settings accordingly.
Background
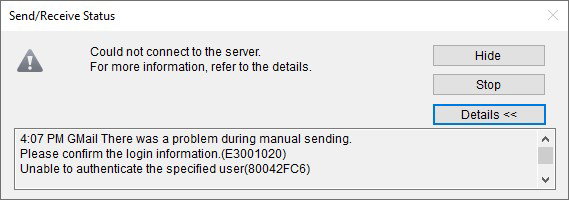
Webmail with ODMS R8/R7: For those using Outlook Web App for Office 365, the word “Failed” will be
displayed in the status bar as you see in the following screenshot, if you try to access after the above
deadline, since user authentication cannot be performed.
If you need to continue using webmail, please follow the steps described in the latter part of this
document to switch your account to another alternative webmail (Gmail, Yahoo mail, Outlook.com).
Steps to change the setting to use Microsoft Outlook Desktop Application
Please follow the steps below to switch to the setting to Microsoft Outlook Desktop Application.
- Install Outlook Desktop App and setup your Office 365 email account
- Register your account
- Delete Outlook Web App for Office 365 Account
- Confirmation of email reception settings
- Confirmation of automatic mail forwarding
Step 1: Install Outlook Desktop App on your PC and setup your Office 365 email account.
Step 2: Start ODMS R8R7 Dictation Module or Transcription Module.
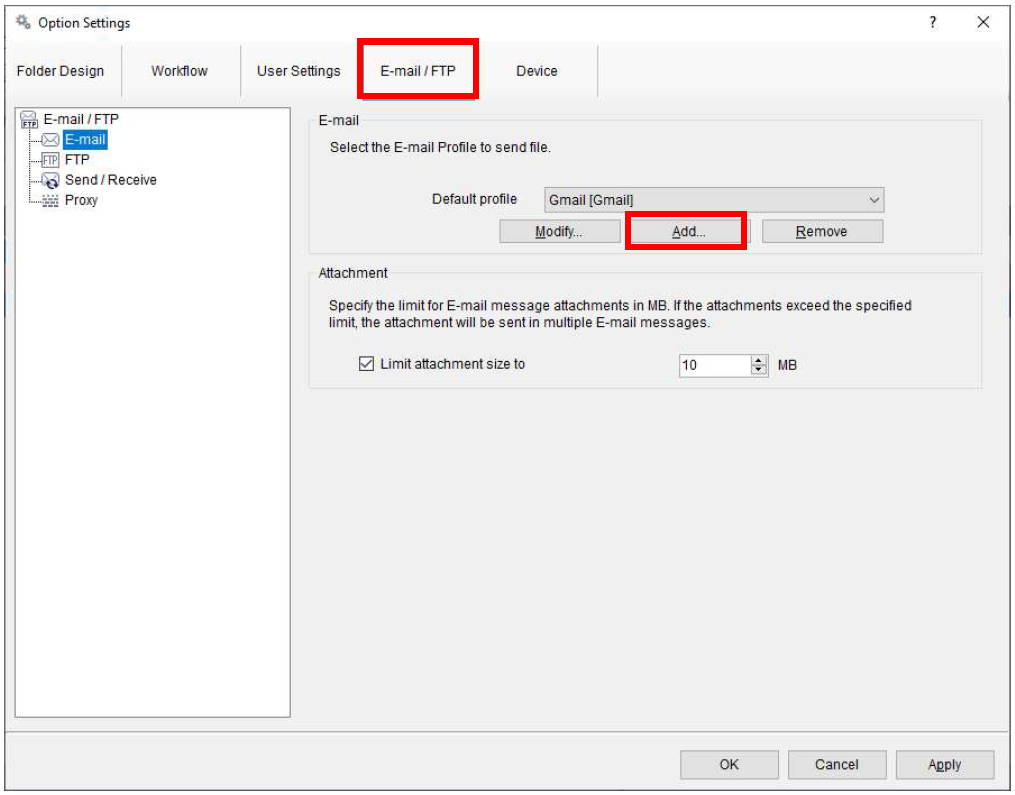
Step 3: Select [Tools]-[Options…] from the menu and click the [E-mail/FTP] button. Click on [Add]./
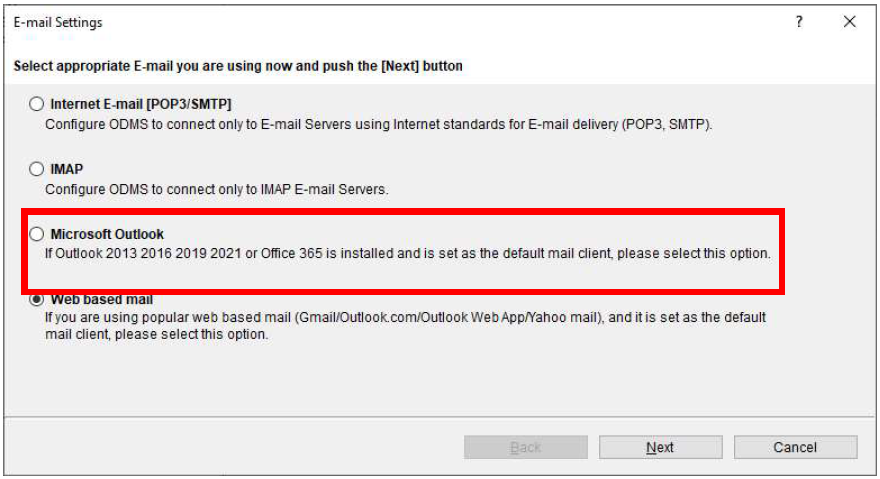
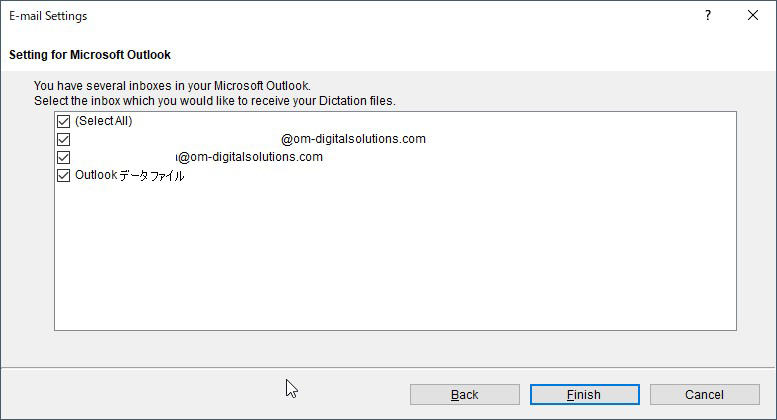
Step 4: Select “Microsoft Outlook”.
Step 5: Select the inbox(s) you wish to use in your Microsoft Outlook and click Finish.
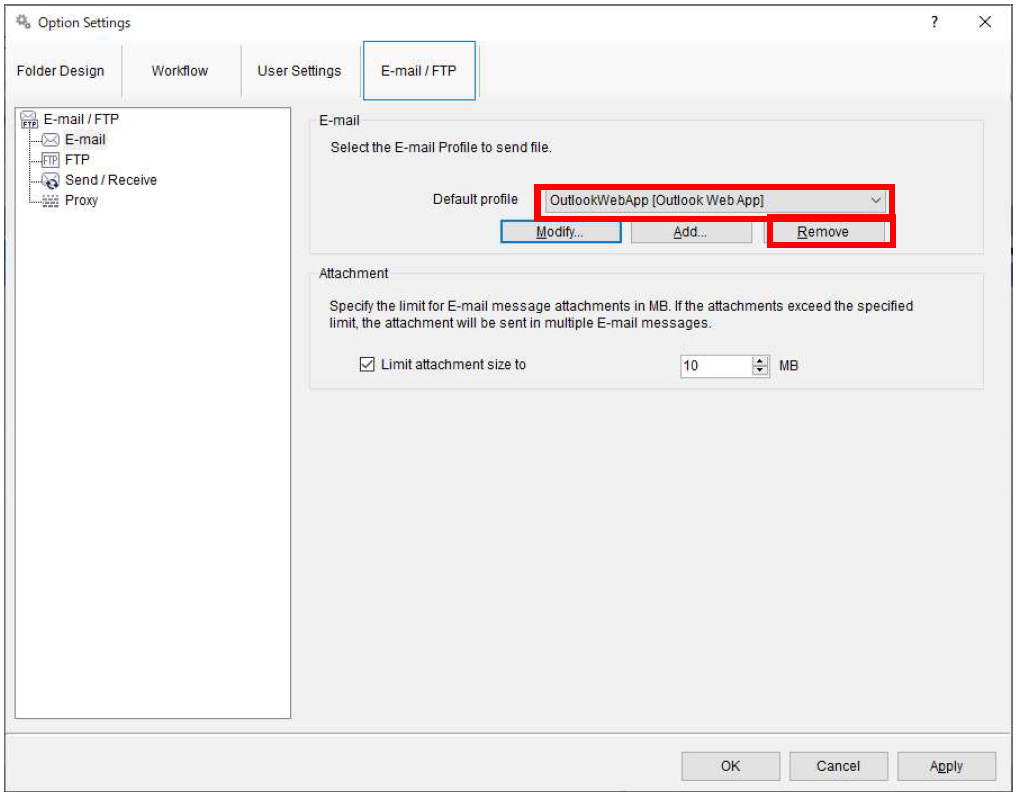
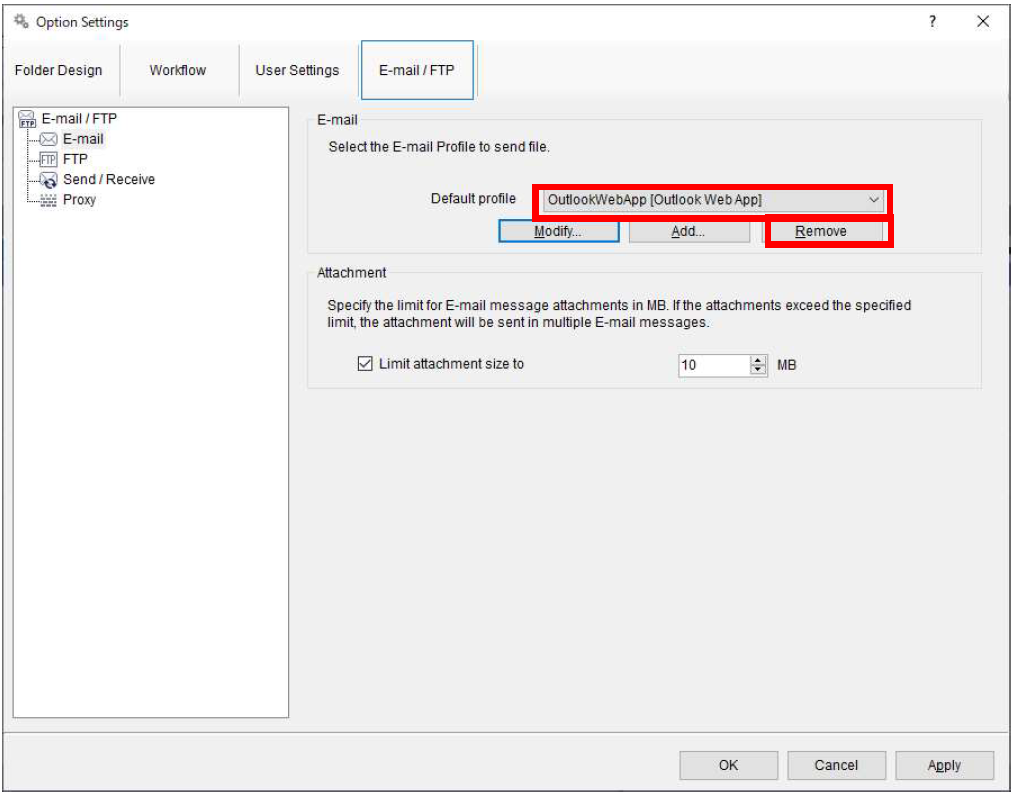
Step 6: From the E-mail/FTP screen, select the previous [Outlook Web App] profile and delete it with
the [Remove] button.
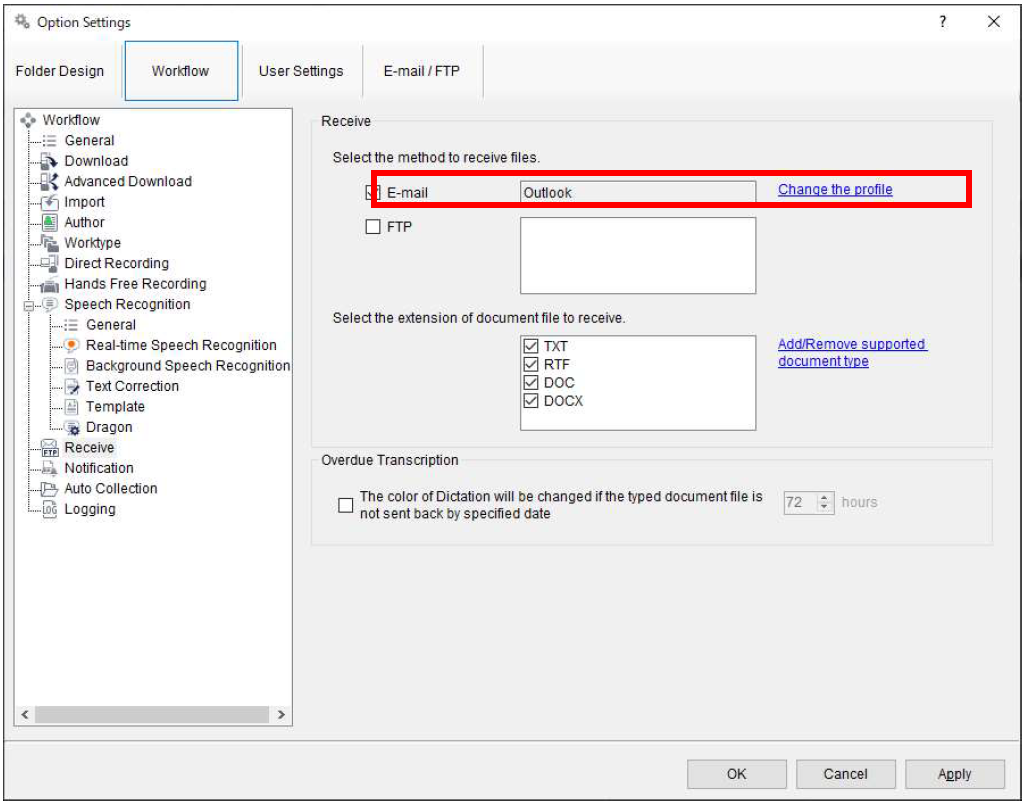
Step 7: On the [Workflow]-[Receive] screen, check that the reception profile setting has been
switched to Microsoft Outlook.
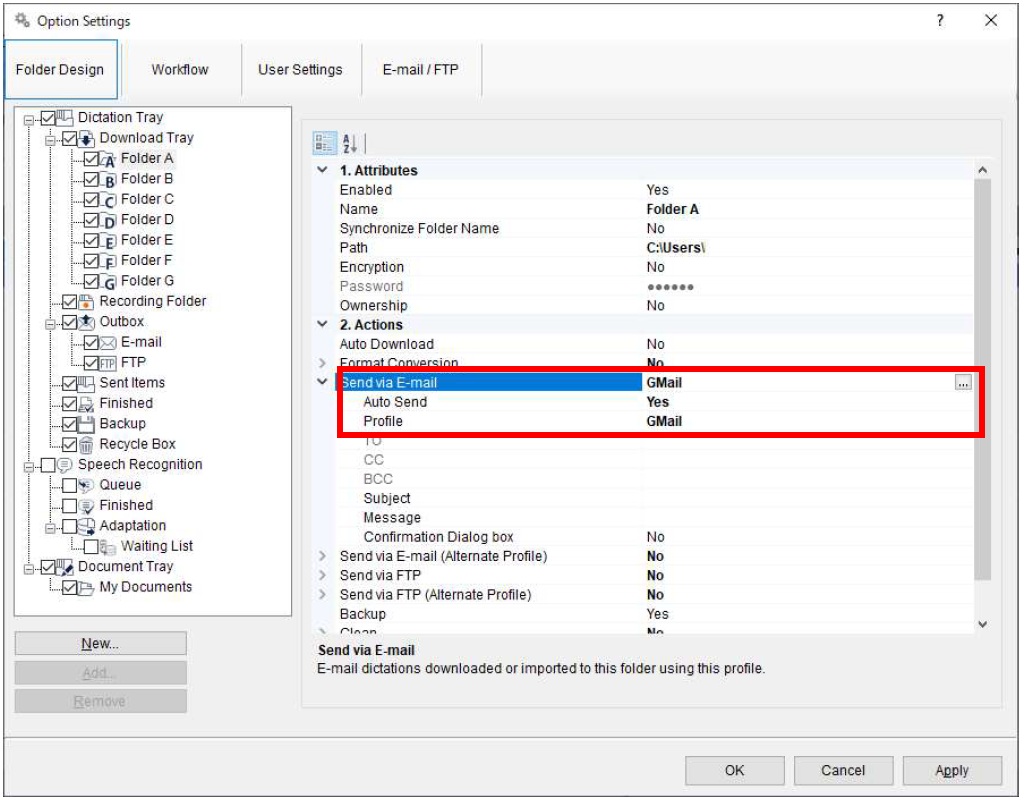
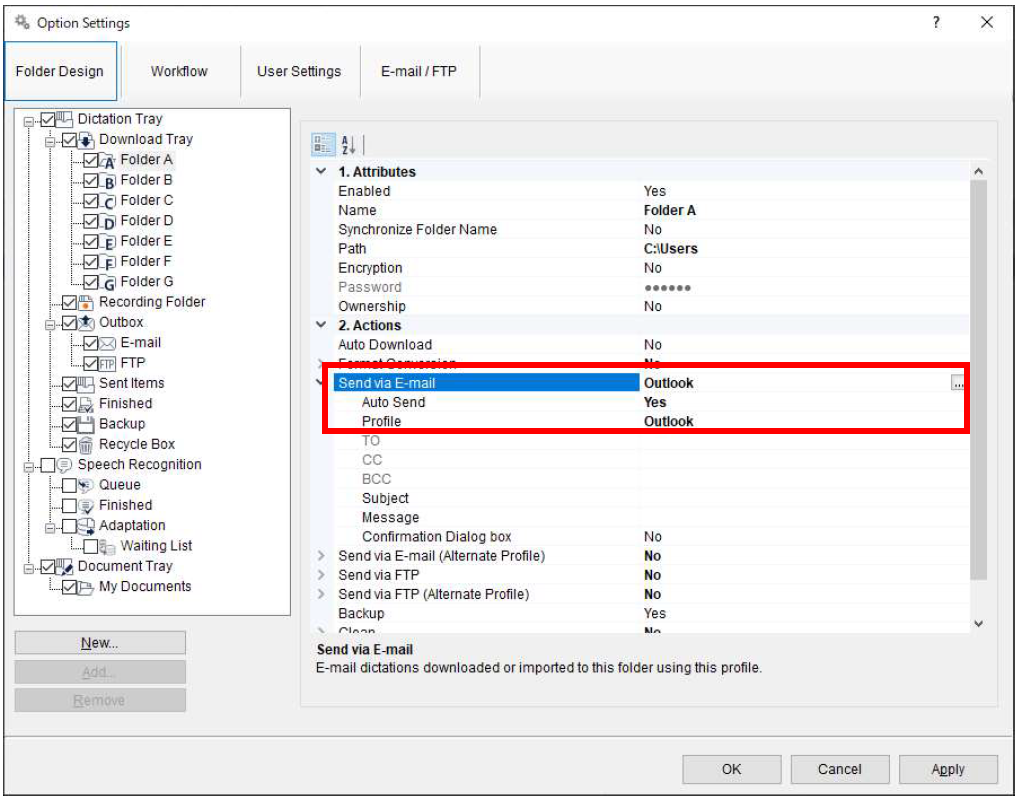
Step 8: If you have specified the automatic forwarding option, please check if your profile is set to an
alternate email from the [Folder Settings] button on the main screen.
Steps to change the setting to an alternative webmail
Please follow the steps below to switch to an alternative web account
Create and register an account with alternative webmail
Delete Outlook Web App for Office 365 Account
Confirmation of email reception settings
Confirmation of automatic mail forwarding
Step 1: Create one of the following alternative accounts other than Outlook Web App for Office 365
in advance.
- Gmail
- Yahoo! Mail
- Outlook.com
NOTE: For Gmail and Yahoo! Mail, you need to enable two-factor authentication and create an app
password.
Step 2: Start ODMS R8/R7 Dictation Module or Transcription Module.
Step 3: Select [Tools]-[Options…] from the menu and click the [E-mail/FTP] button. Click on [Add]
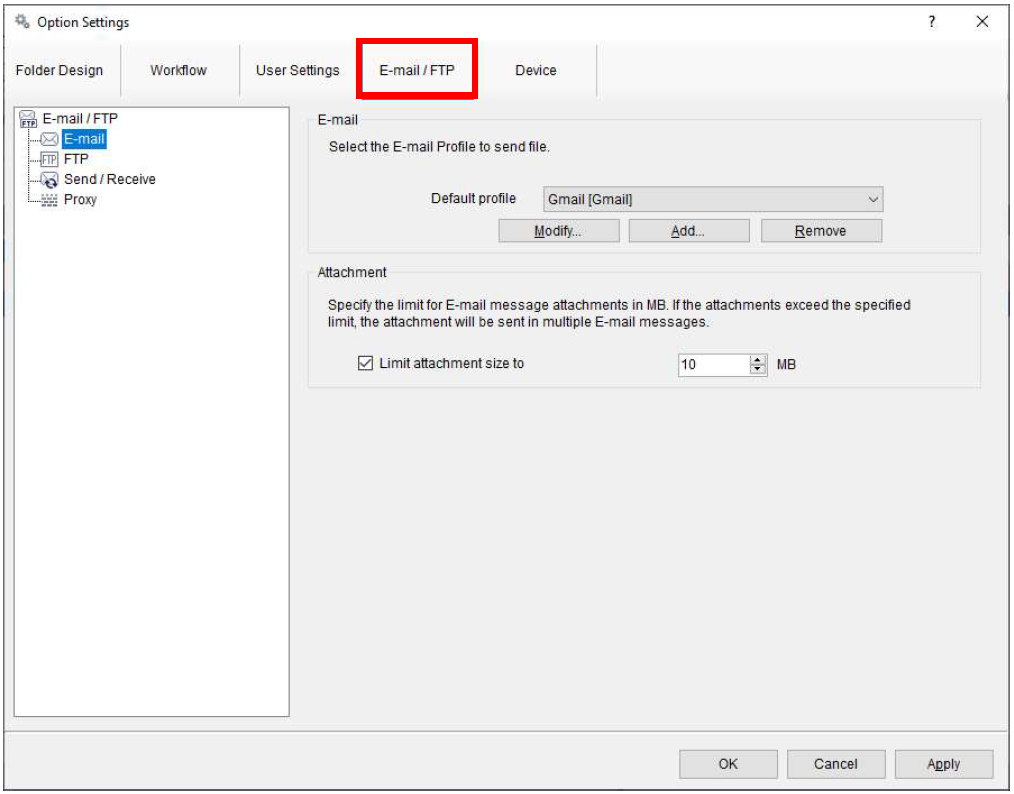
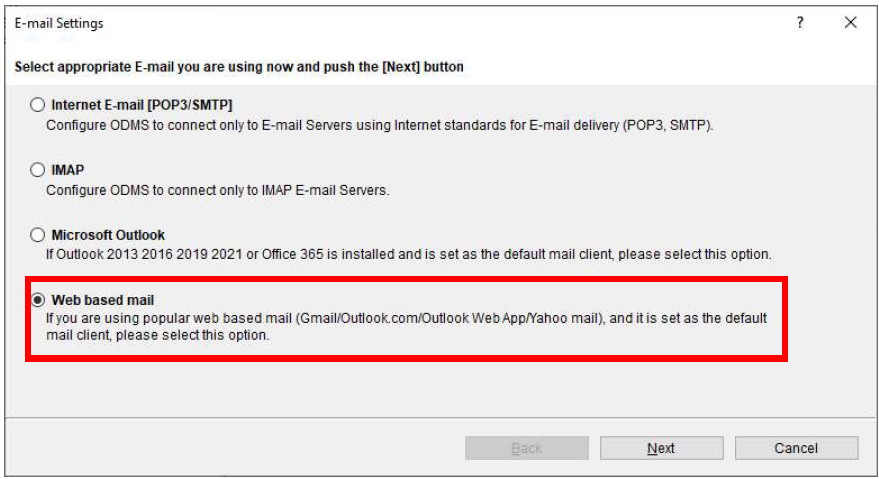
Step 4: Select “Web based mail”.
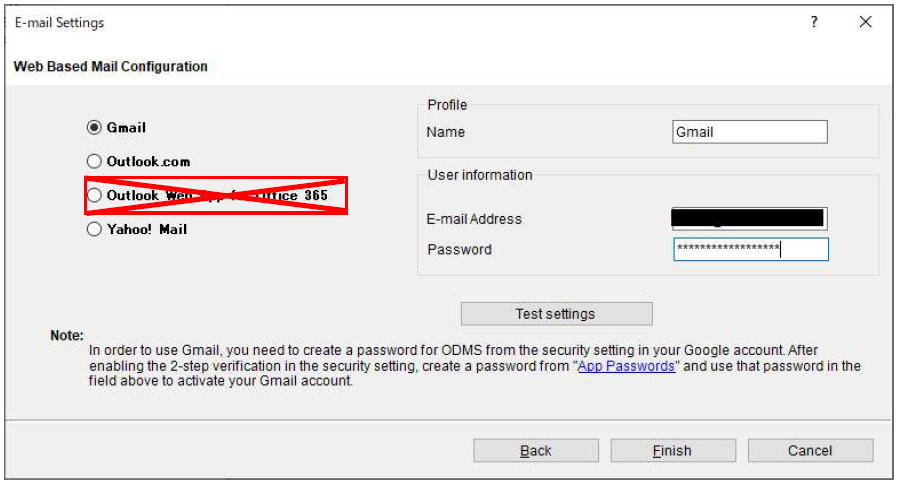
Step 5: Select the alternate email created in Step 1 and enter your account information.
(Example with Gmail.com account. For Gmail, you need to setup the app password as described in
Step1.)
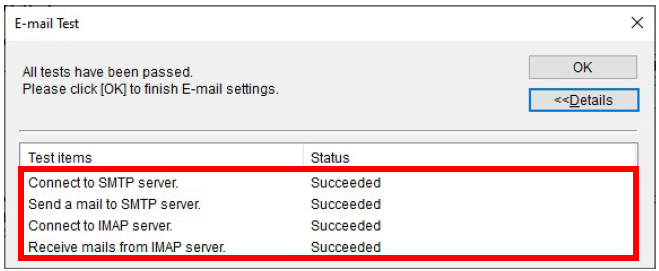
Step 6: Click [Test Settings] to verify your account information.
If the word “Succeeded” is displayed for all Status, the connection with the mail server is completed.
Press the [Finished] button to complete the settings. If it is “Failed”, please review the selected email
type and account information again.
Step 7: From the E-mail/FTP screen, select the previous [Outlook Web App] profile and delete it with
the [Remove] button.
Step 8: On the [Workflow]-[Receive] screen, check that the reception profile setting has been
switched to an alternative email (Gmail).

Step 9: If you have specified the automatic forwarding option, please check if your profile is set to an
alternate email from the [Folder Settings] button on the main screen.