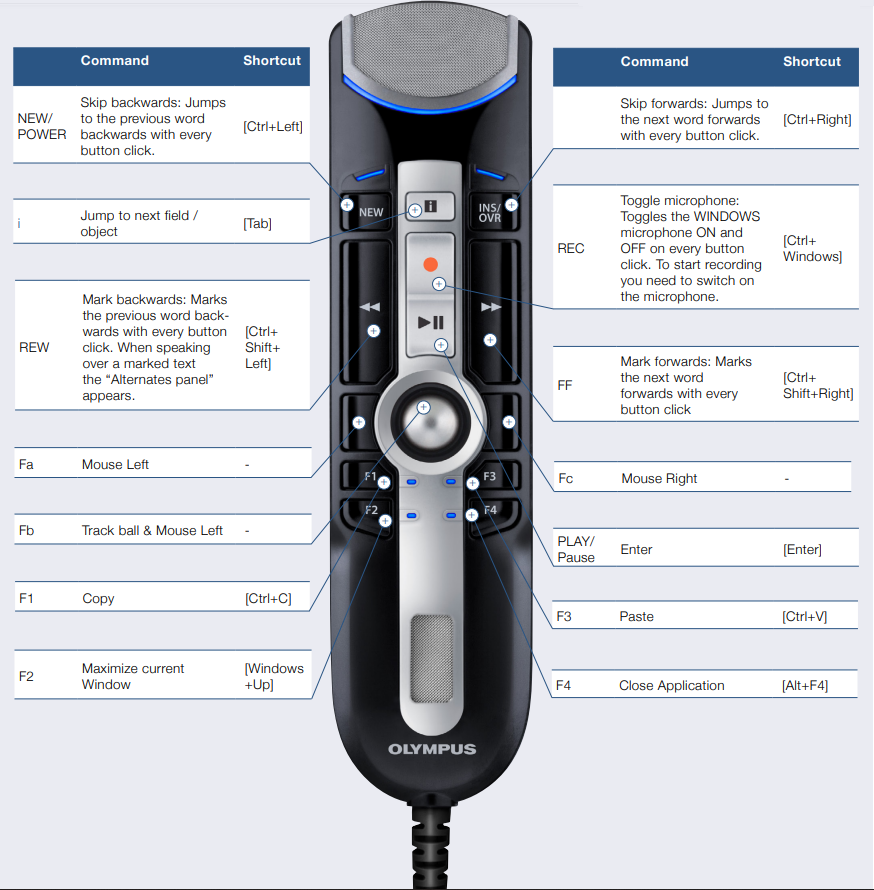
Button Settings: Windows Speech Recognition
The RecMic Series II models RM-4010P and RM-4015 P can be easily used with Windows Speech Recognition via Plug & Play. No additional software is required. The buttons of the RecMic II are already preconfigured with the following settings and commands:
To activate the Windows Mode press the NEW and INSERT button until the LEDs will start to flash, followed by F4.

RecMic II Configuration Settings

Check your recording environment
The noise analyzer function checks if your recording environment is good for speech recognition. Press F1 and F3 button for about 5 seconds. If the noise level is too high, the LED on the top will flash. If so, it is recommended to change the environment.

Change Modes
Press F1 and INSERT button for about 5 seconds. By repeating this operation, it will toggle between modes. You can confirm the recording modes by the color of the LEDs.
Blue = Quiet Environment
Green = Noisy Environment for Speech Recognition
Red = Noisy Environment for Classic Dictation

Change Modes
Press NEW and INSERT button until LEDs from F1 to F4 flash (flashing will last for 15 seconds). During this time, we can choose the preferred preset button modes from F1 to F4.
F1 = Olympus Mode
F2 = Custom Mode
F3 = Dragon Mode
F4 = Windows SR Mode
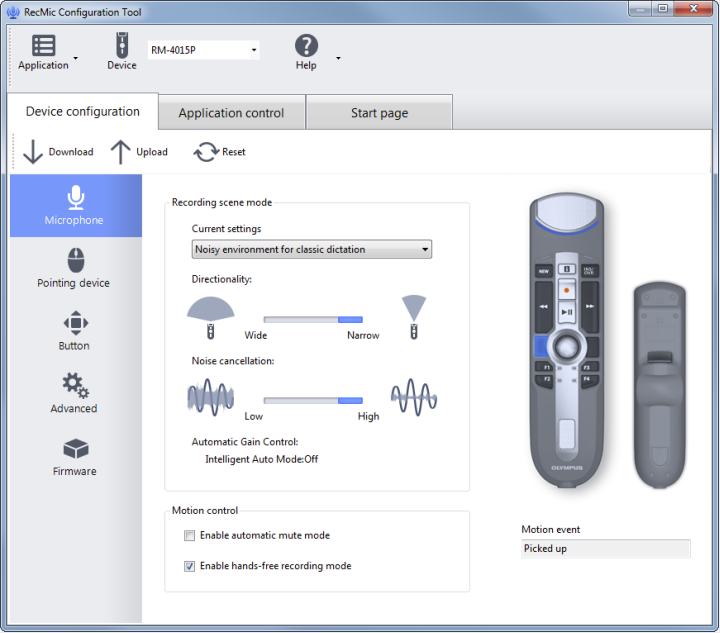
RecMic Configuration Tool
The RecMic II can be configured with the RecMic Configuration Tool. The application is free and can be downloaded from the link here.
The tool supports the following features:
- Device Configuration
- Recording Mode Setting
- Mouse Control Setting
- Custom Keyboard Setting
- Firmware Update
- Other General Setting
- Application Control
- Edit Command
- Keyboard Template