This article goes through the Email Profile setting on the DS-9500 recorder so you can send dictations via Email. This assumes you already have configured your DS-9500 recorder with a WiFi network if not then please follow the guide Configuring the DS-9500 to use a WiFi network before proceeding.
- Open the Dictation Module
- Connect the DS-9500 recorder.
- Click on Tools then click on Options and click on Device.
Note: Device settings will not appear if the recorder isn’t connected.
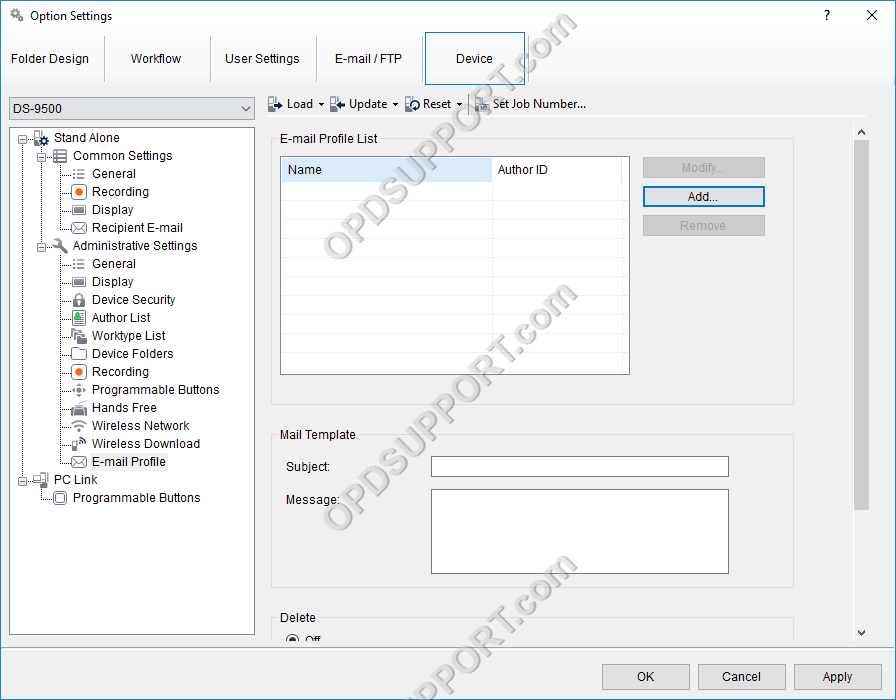
- Select Email Profile
- Click Add
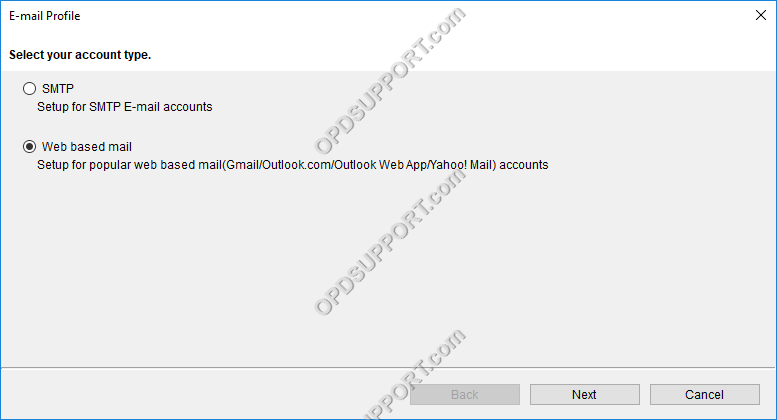
- Select the email account type.
- Select web based mail if you have one of the specified email accounts. This is a new feature which makes the email configuration process simpler where you would only need to enter your email address and password.
- Select SMTP if you have any other email accounts and enter your email address, password and the SMTP server details.
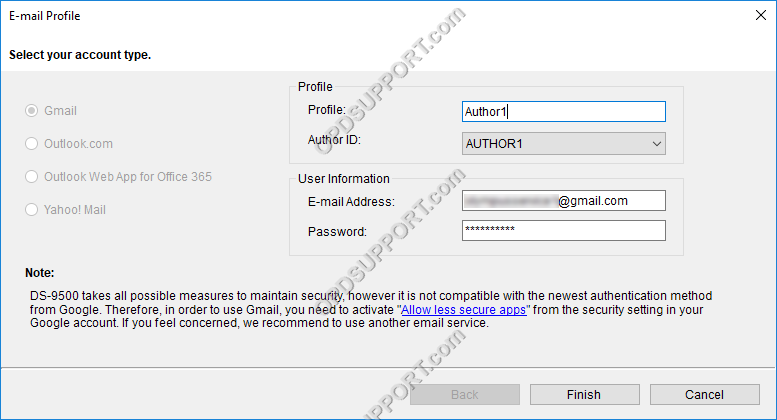
- Select the Email provider
- Enter a Profile name
- Select the Author ID to use.
- Note: you must configure the Author ID in the Workflow tab.
- Enter the Email Address and Password
- Note: Depending on which email provider you use you may need to enable “Allow less secure apps”, please click on the link in the software note section to access your email account to check this setting.
- Click Finish
Repeat the same steps above to add another Email Profile. You can register up to 10 Email Profiles on the recorder.
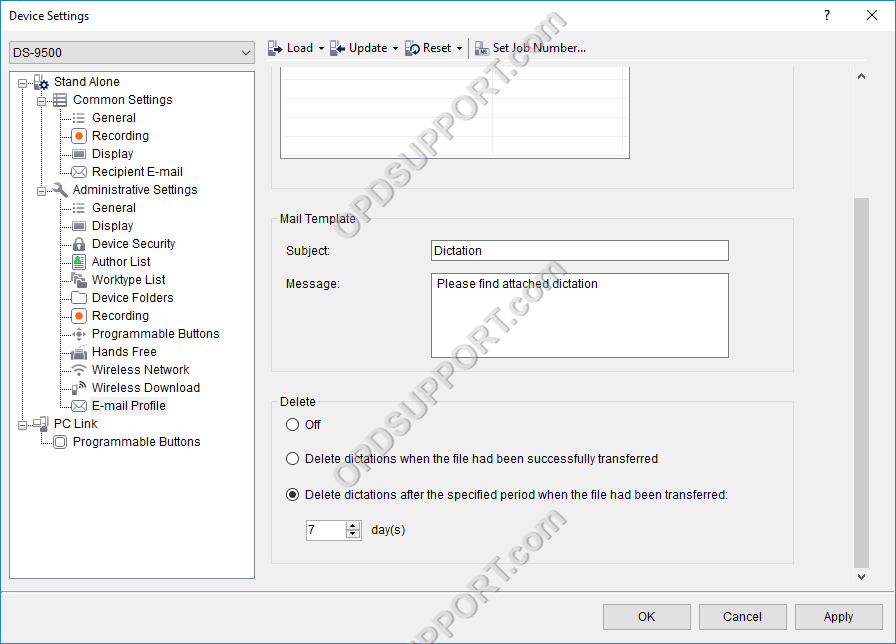
In the Mail template you can enter a Subject and a Message to send with the dictation.
In the Delete options you can configure the recorder to automatically delete the dictations off the recorder or after a specified period once it’s been sent.
Once the Email profile has been configured please follow the guide on how to configure the Recipient Email Settings.
