ODMS supports a number of email methods including POP, IMAP, Outlook (32-bit) and Web based mail. This guide will detail how to set up each type of email profile for use within the Olympus software.
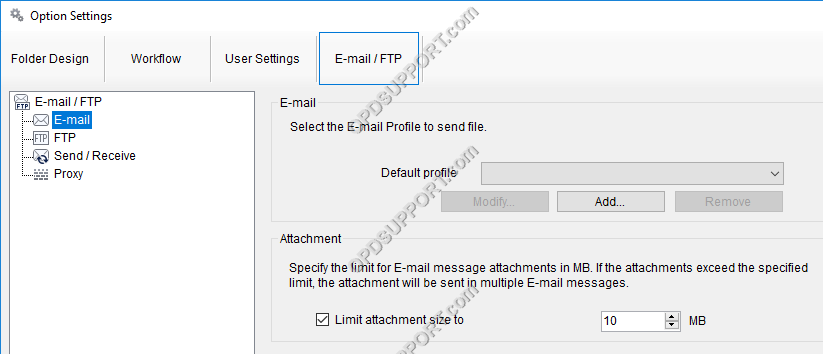
Contents
- How to create a POP Email profile
- How to create an IMAP Email profile
- How to create an Outlook Email profile
- How to create a Web based mail profile
How to create a POP Email profile
This section will detail how a user can create a POP Email profile, the example POP Email account will be using Gmail but this process applies to any POP/SMTP account.
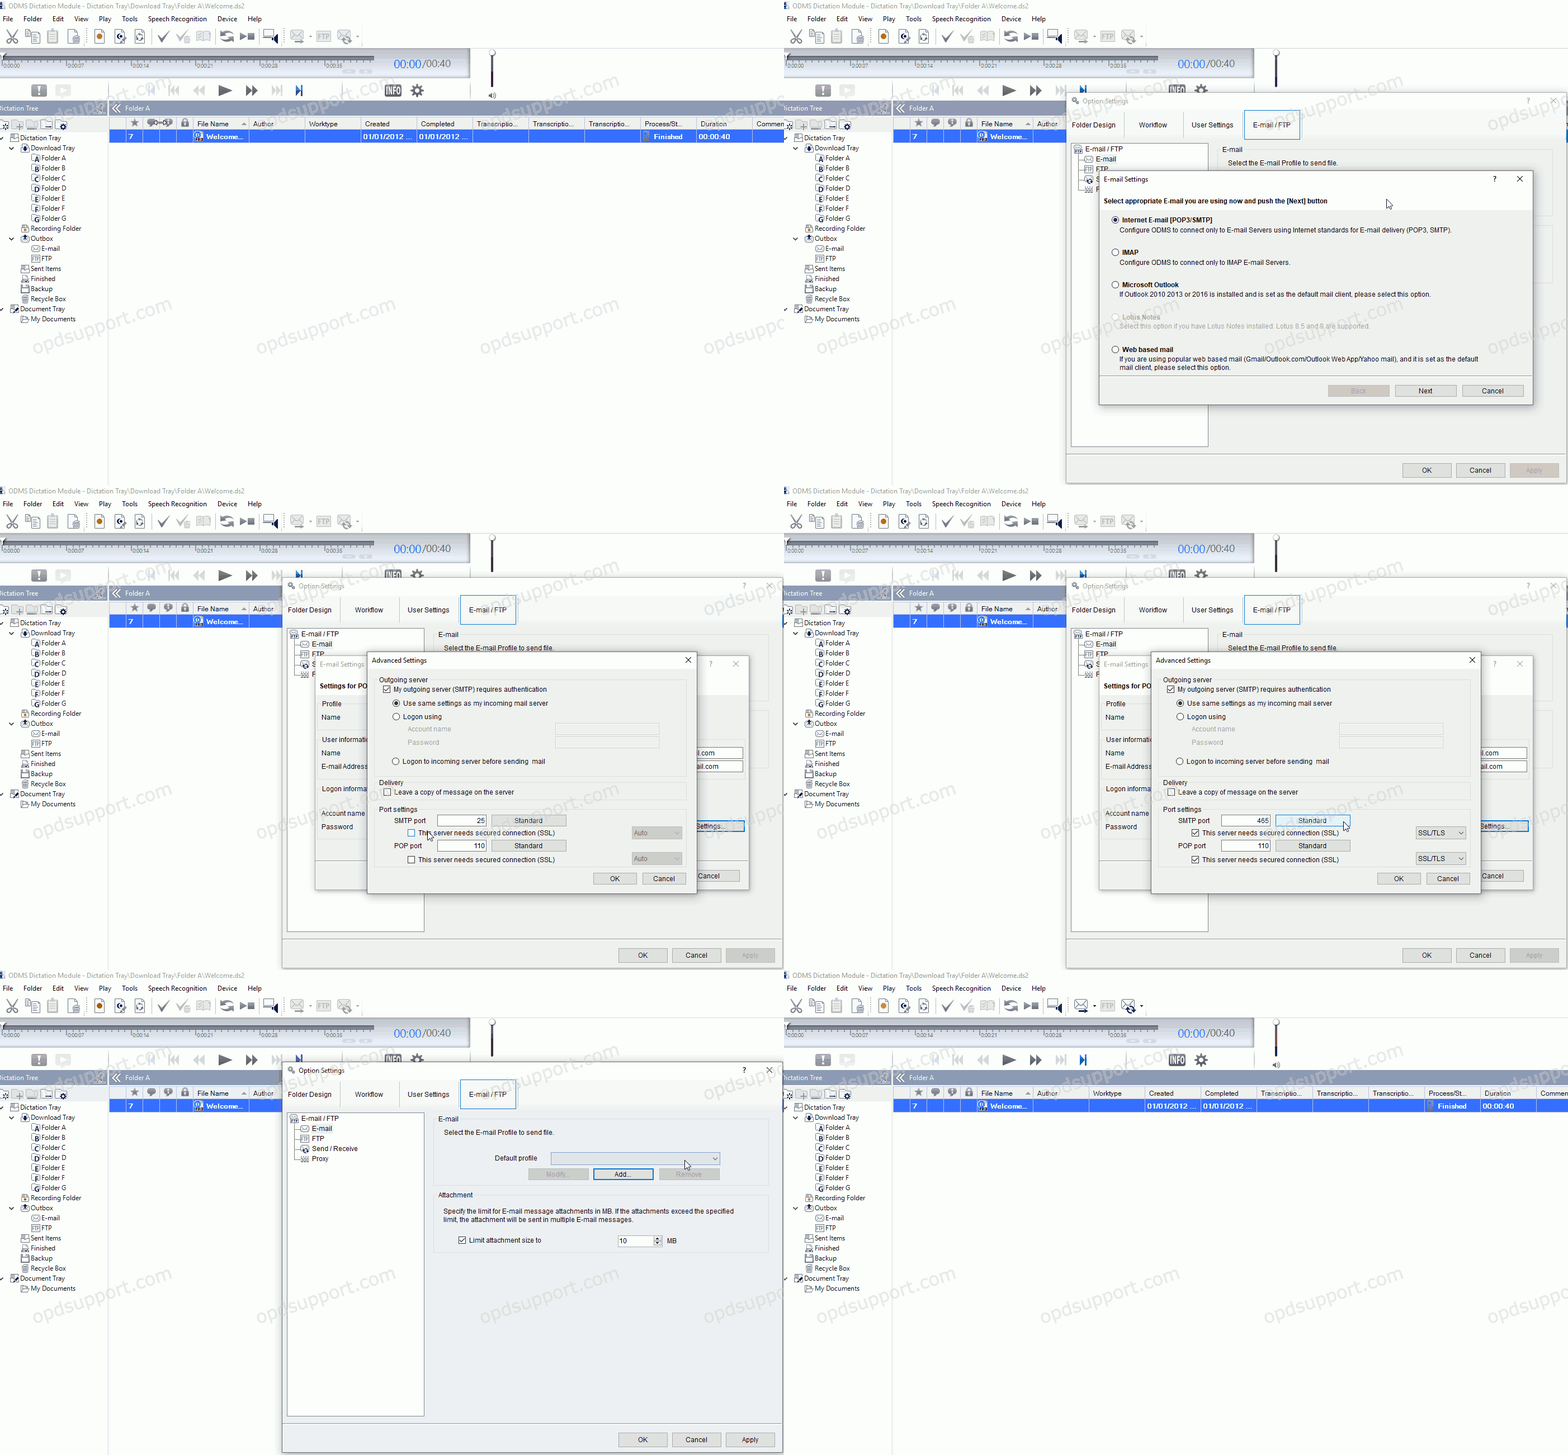
To create a POP Email profile:
- Click Tools > Options > Email / FTP.
- Click on Add > Select Internet Email [POP3/SMTP].
- Click Next
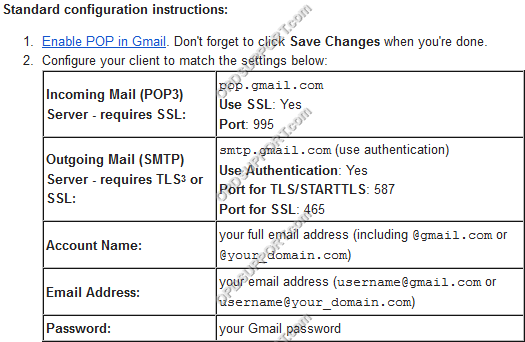
- Enter the details for the POP account. These settings can normally be retrieved from the Email provider as per the example below.
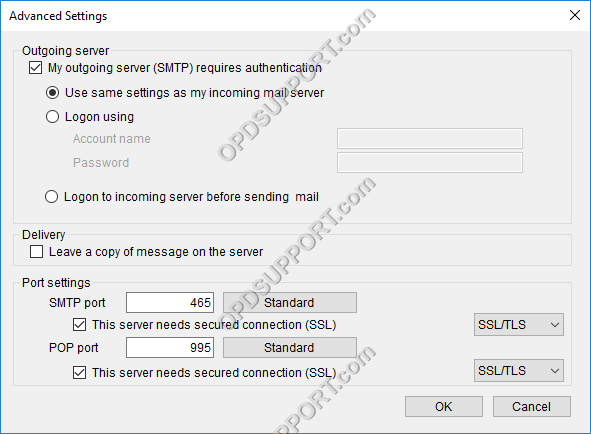
- Once the basic settings have been entered, click on the Advanced Settings button to configure settings such as Outgoing Server authentication and SSL ports.
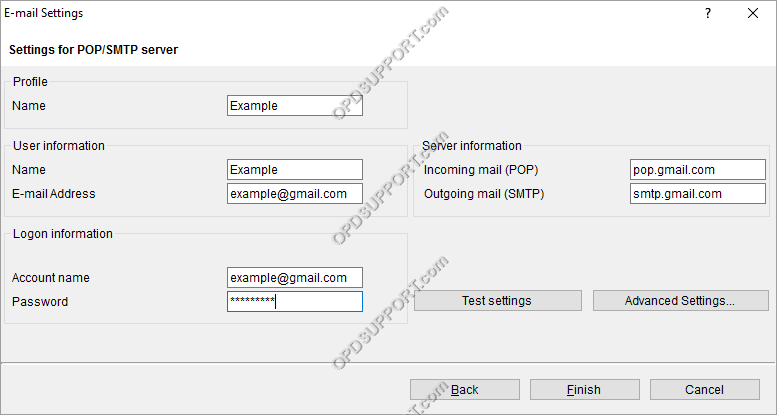
- Enter the Advanced Settings as per the specifications of the Email provider.
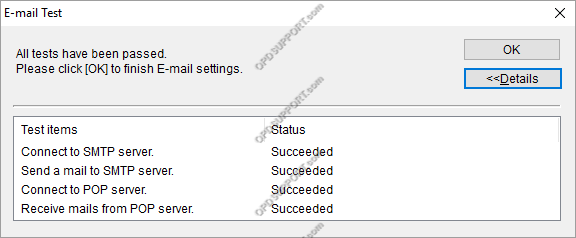
- Once all of the details have been entered, click Test Settings to ensure that the profile has been configured completely.
How to create an IMAP Email profile
This section will detail how a user can create a POP Email profile, the example POP Email account will be using Gmail but this process applies to any POP/SMTP account.
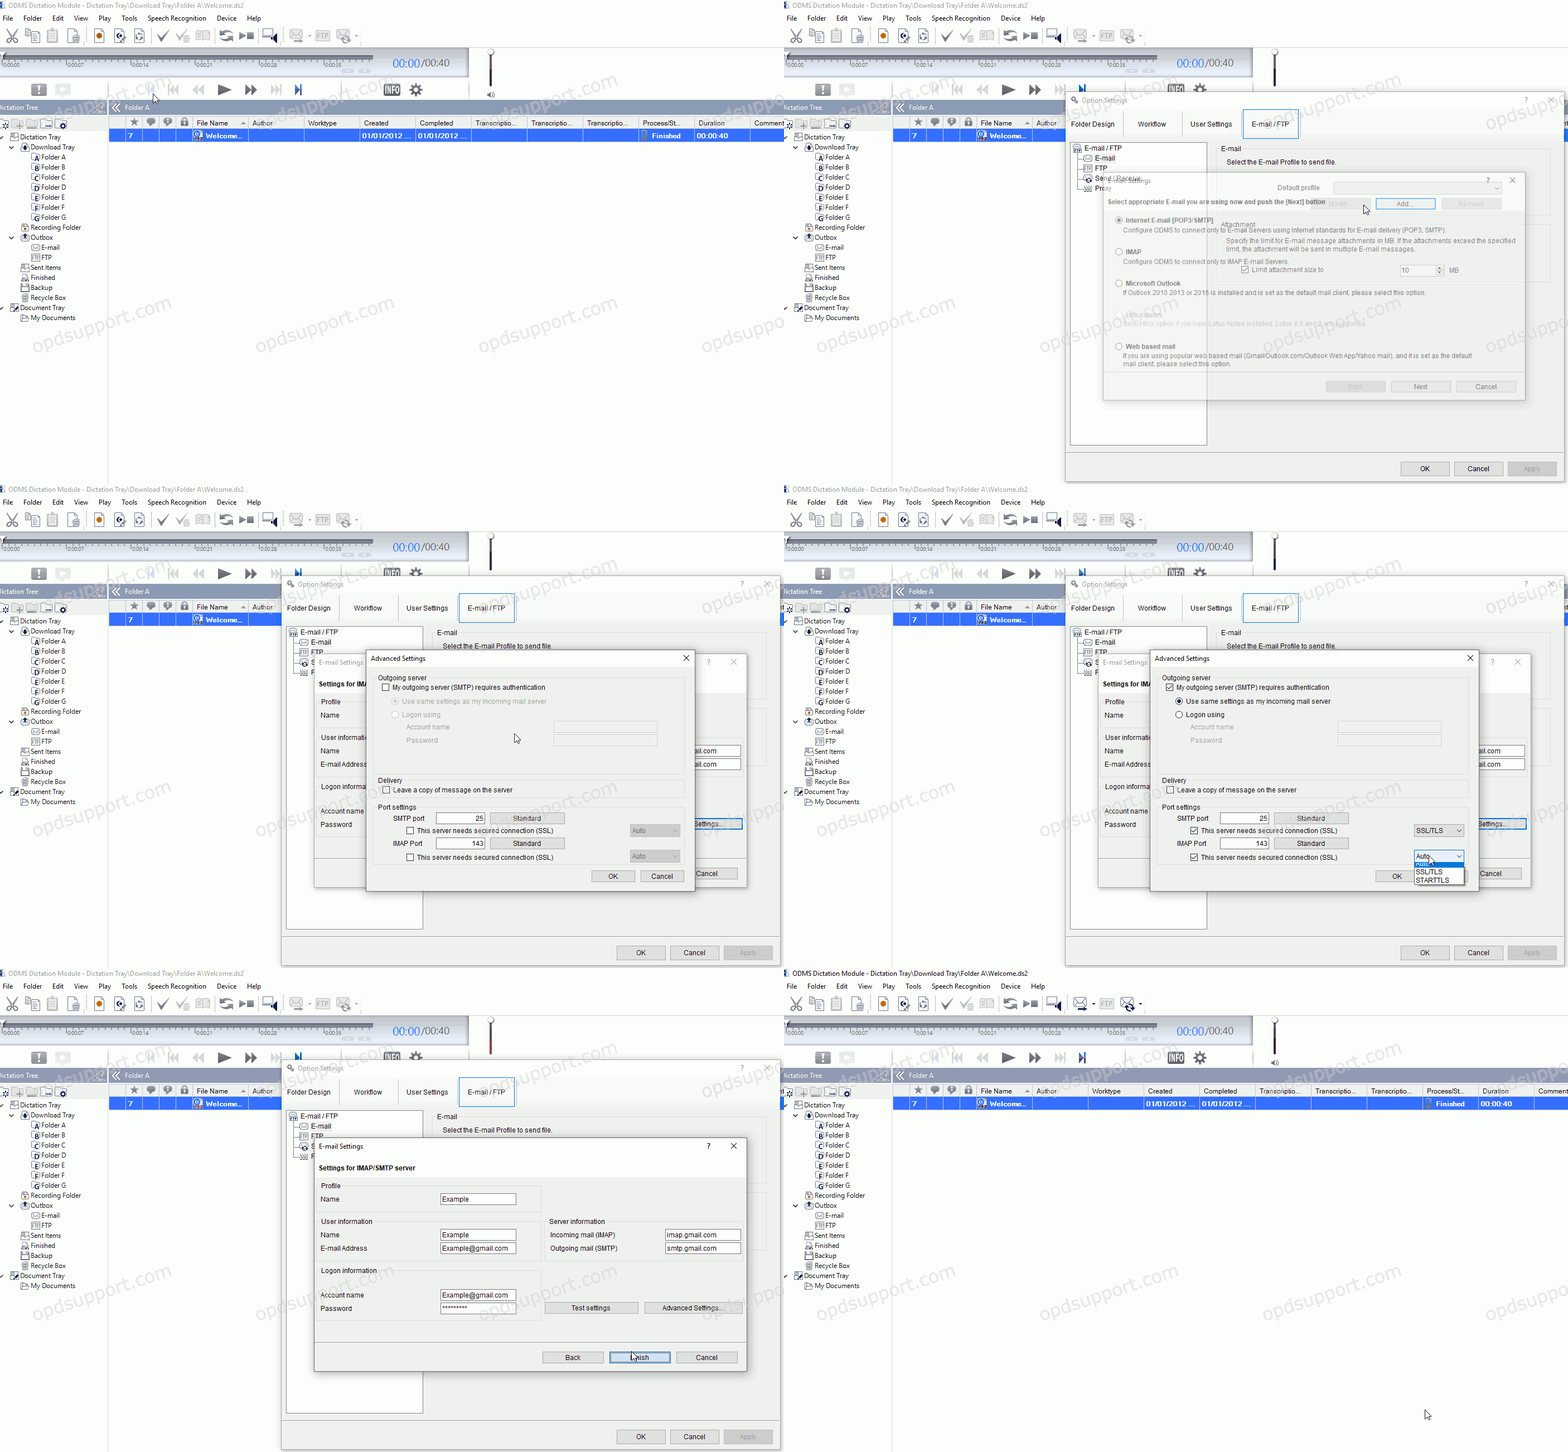
To create an IMAP Email profile:
- Click Tools > Options > Email / FTP.
- Click on Add > Select IMAP.
- Click Next.
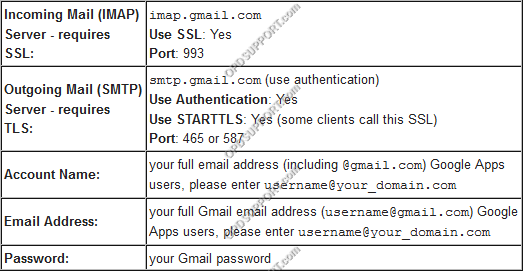
- Enter the details for the IMAP account. These settings can normally be retrieved from the Email provider as per the example below.
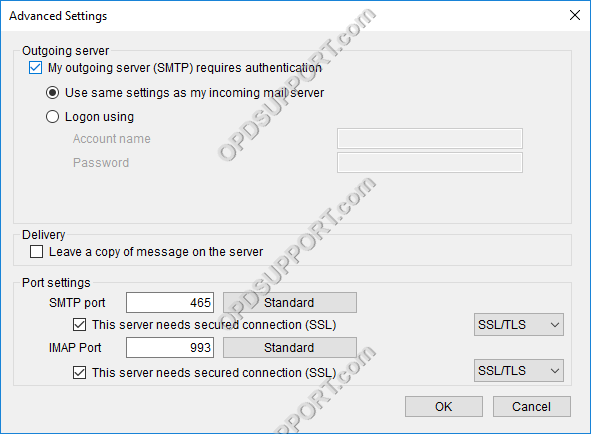
- Once the basic settings have been entered, click on the Advanced Settings button to configure settings such as Outgoing Server authentication and SSL ports.
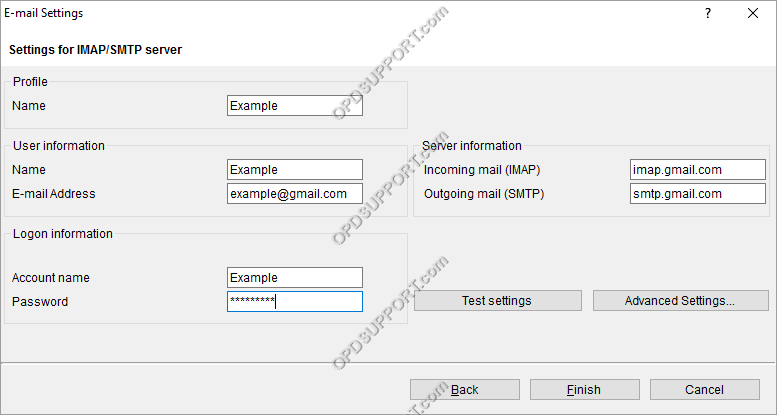
- Enter the Advanced Settings as per the specifications of the Email provider.
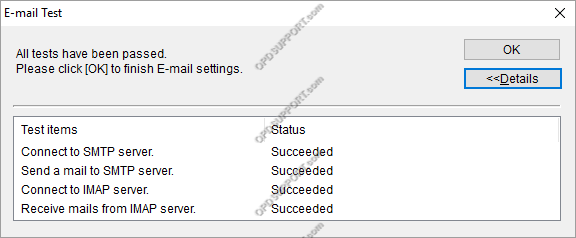
- Once all of the details have been entered, click Test Settings to ensure that the profile has been configured completely.
How to create an Outlook Email profile
Note: In order to add an Outlook profile into ODMS, Microsoft Outlook 2010, 2013 or 2016 must be installed to the computer.
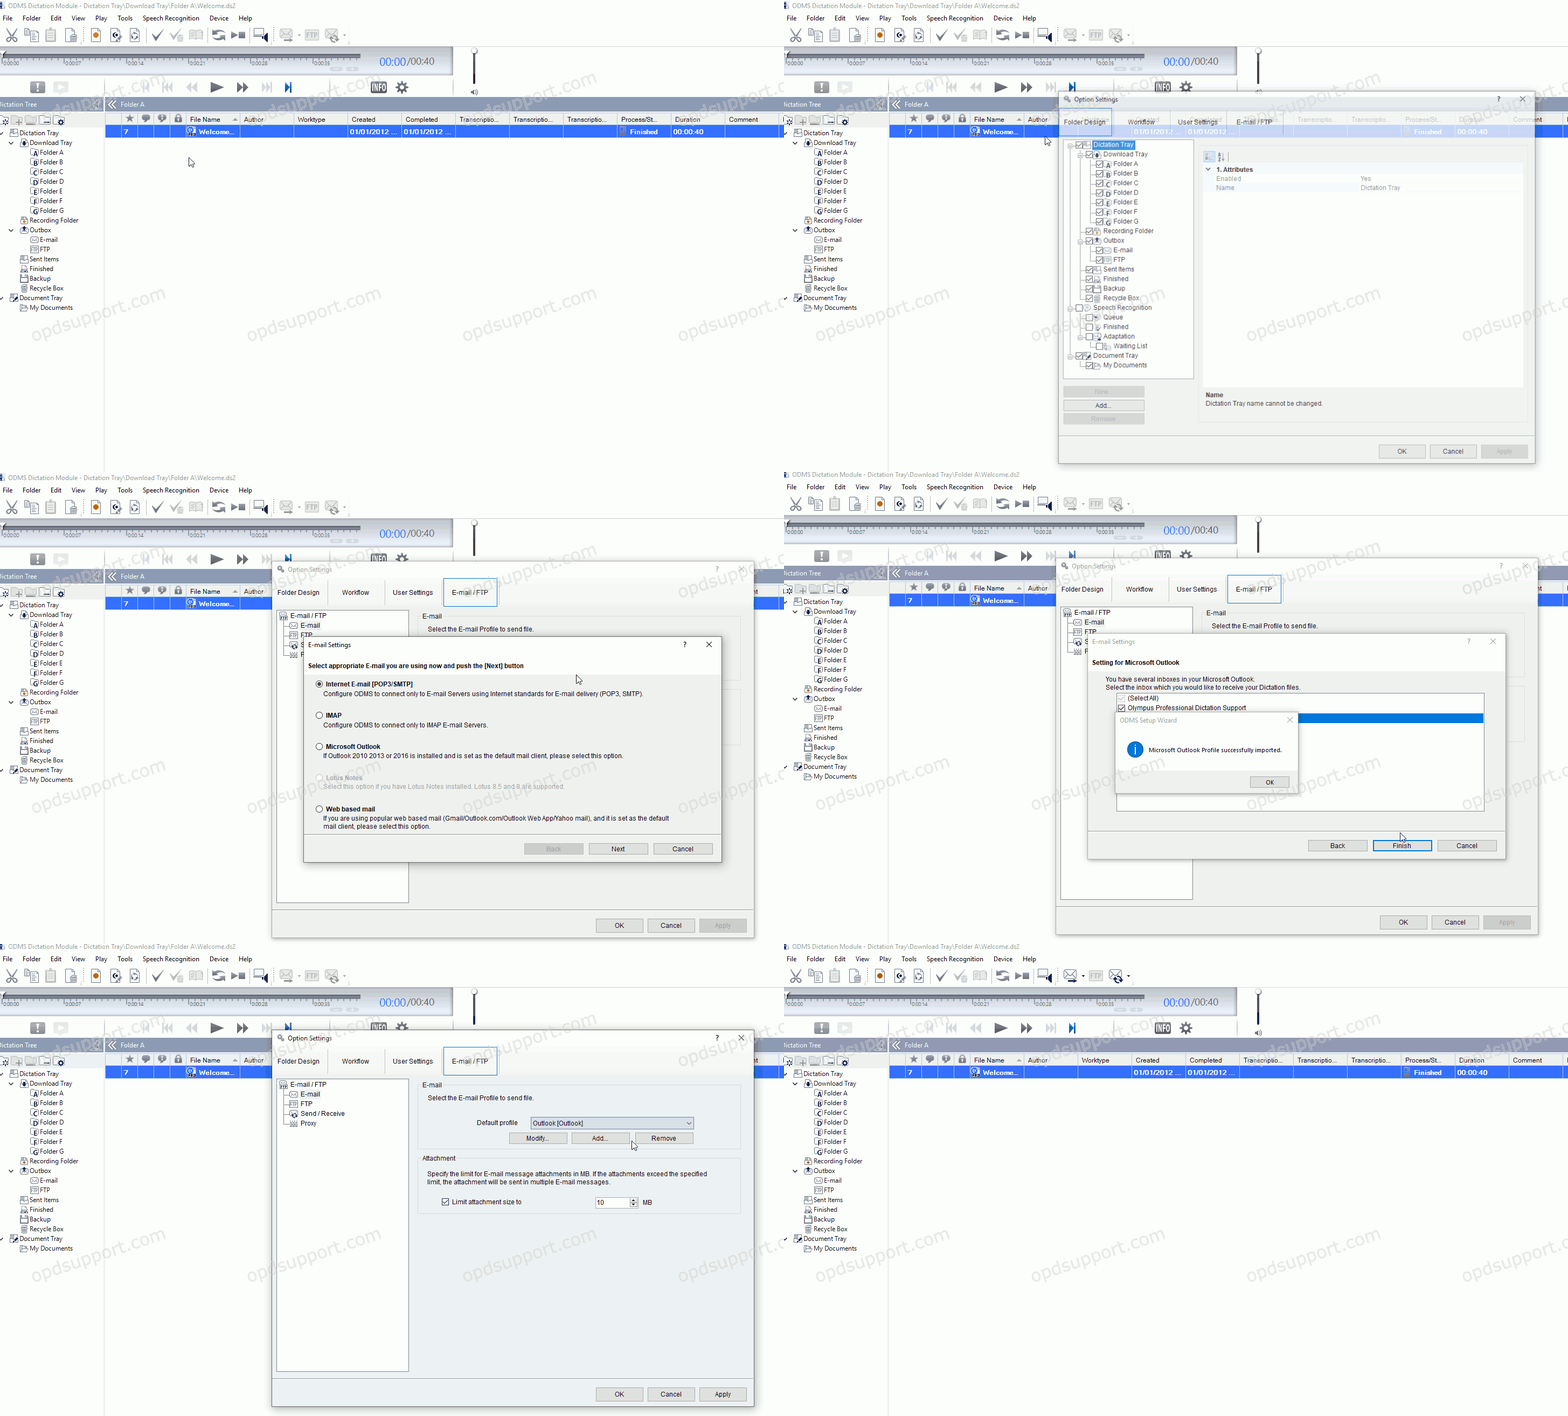
To create an Outlook Email profile
- Click Tools > Options > Email / FTP.
- Click Add > Select Microsoft Outlook.
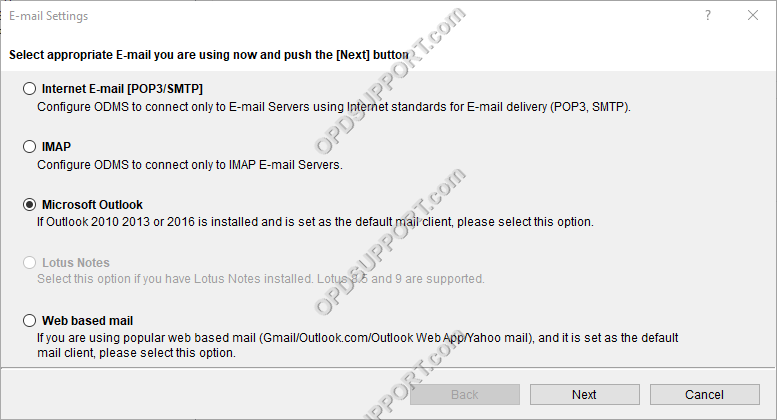
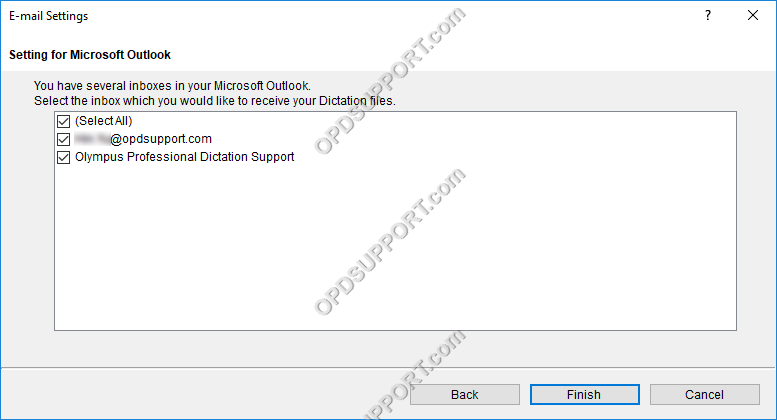
- If your Outlook profile has multiple inboxes then you can select which inbox you want to use to receive the files.
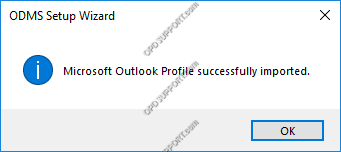
- Click Finish to add the Outlook profile.
- Click OK.
How to create a Web based mail profile
This is a new feature in ODMS R8/R7 which essentially simplifies the email configuration if you have an email account with one of the specified email providers, then you only need to enter the Email address and password so you no longer need to find out and enter the server details.
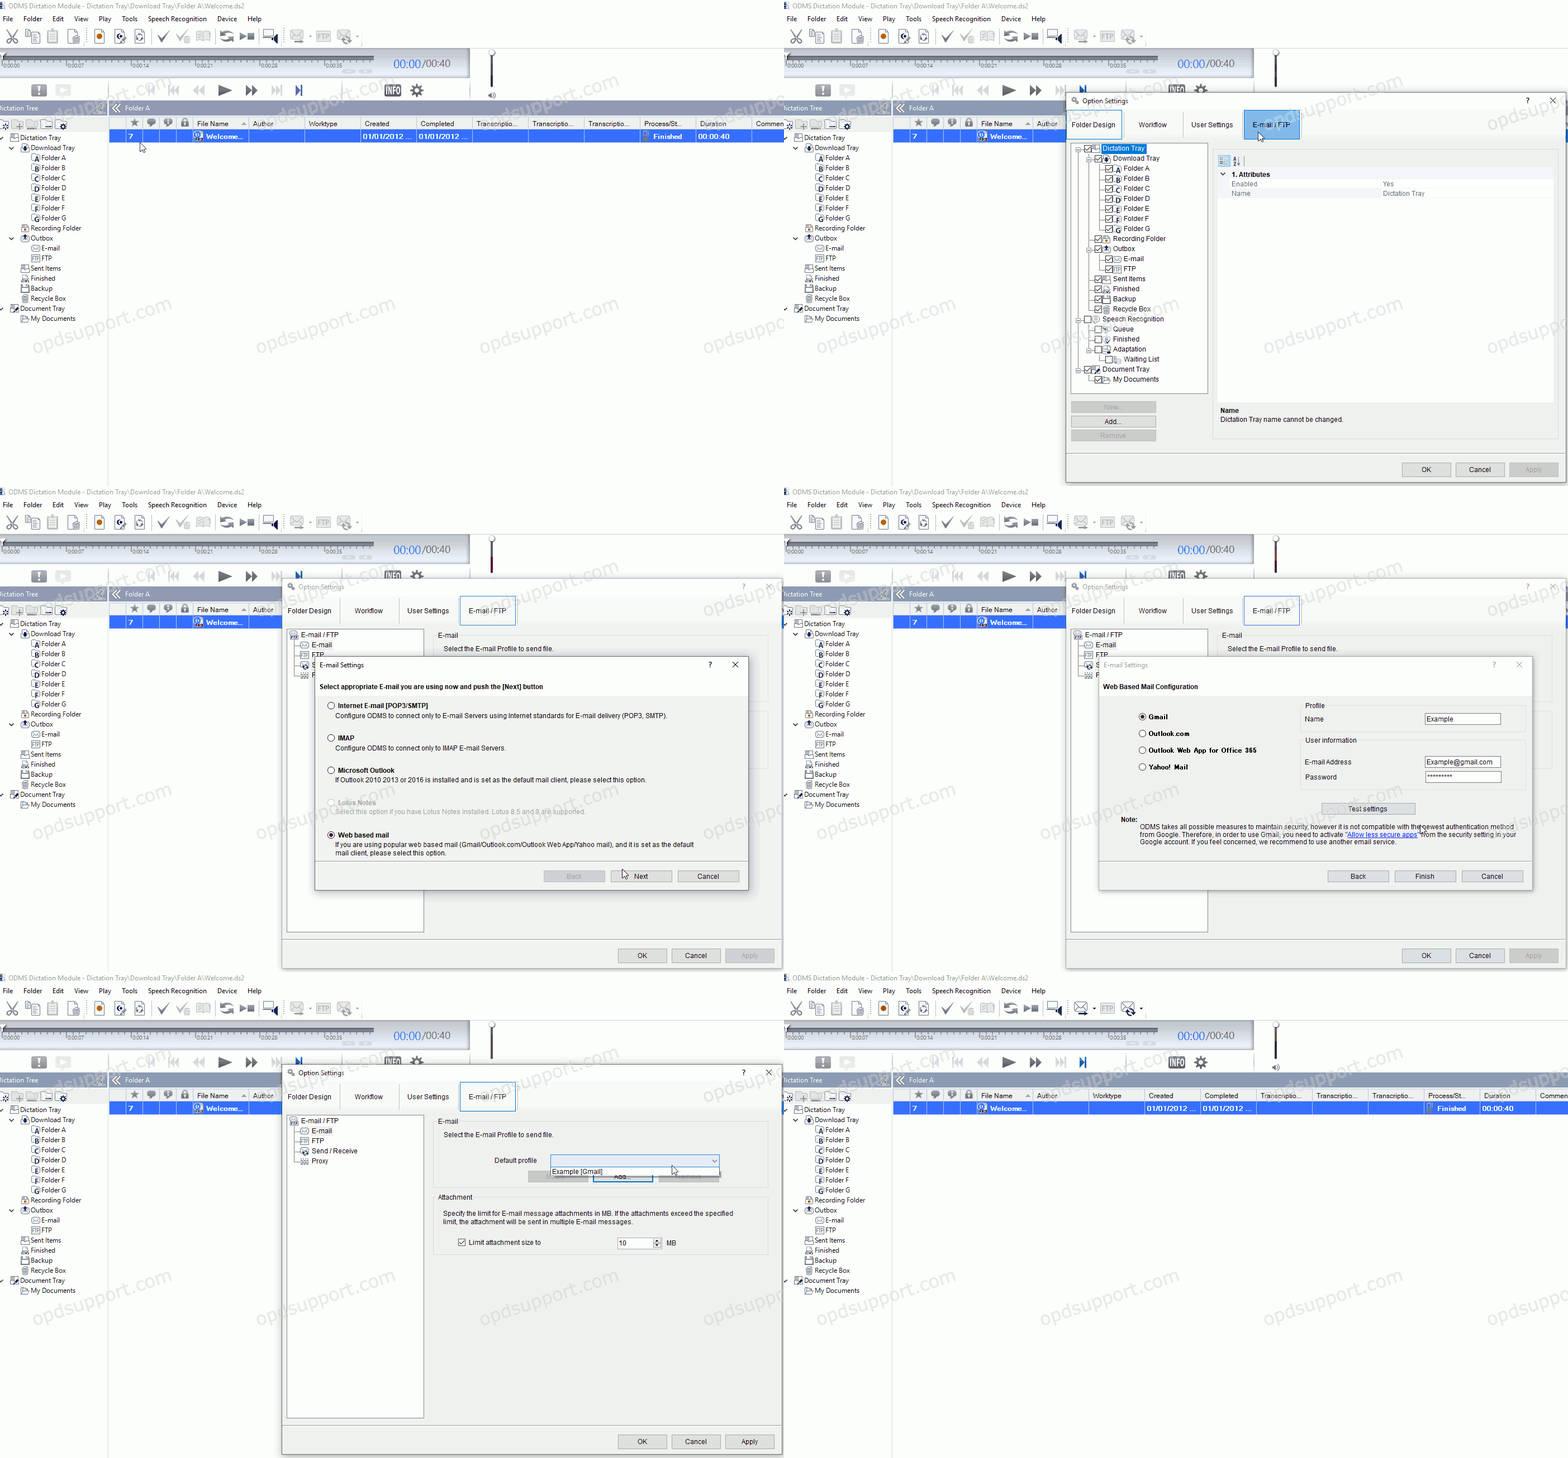
To create Web based mail:
- Click Tools > Options > Email / FTP.
- Click add and select Web based mail and click next
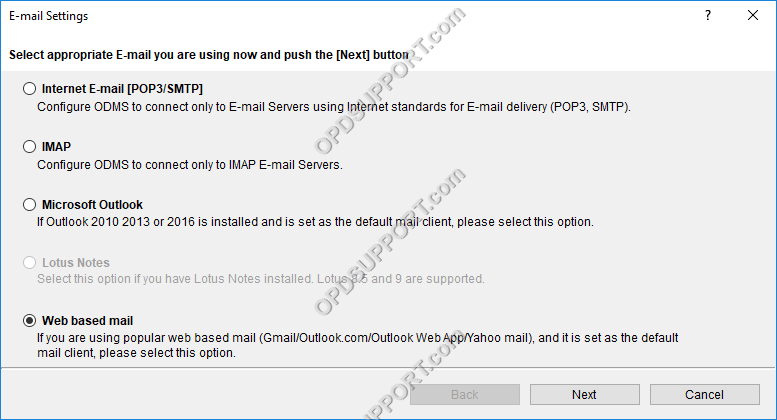
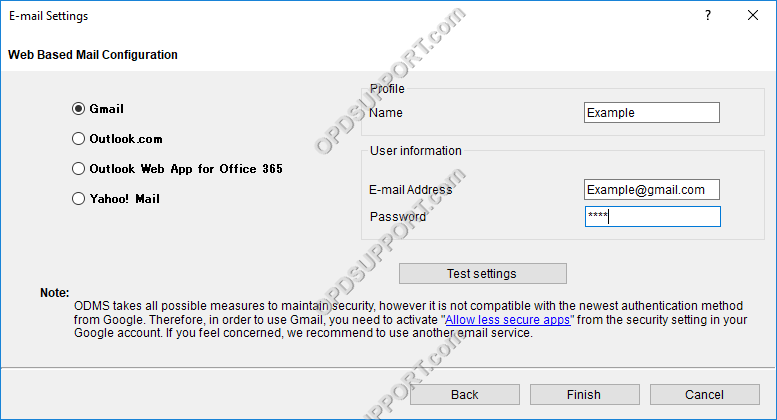
- Select the Email account that you have and enter the following
- Profile name
- Email address
- Password
- Click Test settings to confirm the details are correct.
- Click Finish
Once the email profile has been configured you can follow the next guides to configure the software to automatically send dictations via email or configure to automatically receive dictations via email.
The ODMS R8/R7 supports FTP, which allows for efficient file transfer and management within the system. This functionality is designed to streamline the workflow for dictation and transcription tasks by enabling secure and reliable file transfers between the ODMS components and external servers.
