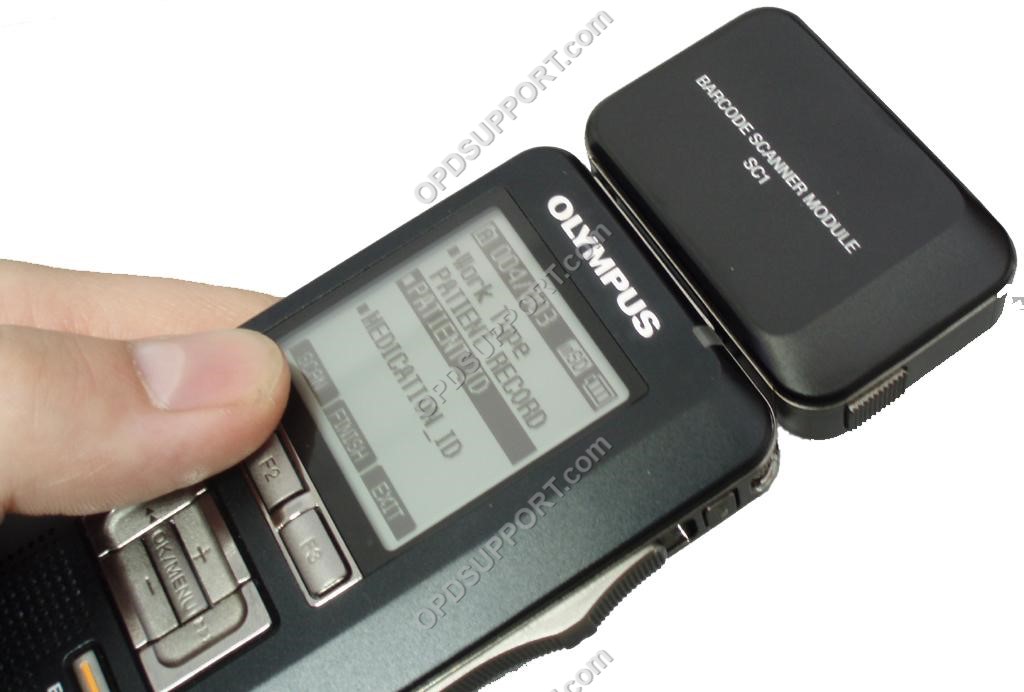
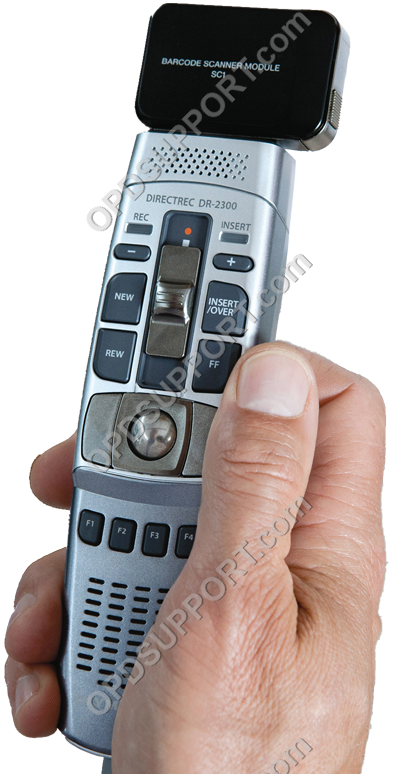
The SC1 is a Plug-in module for DS-5000 / 5000iD / DS-5500 / RecMic DR-2300 and connects via the units SDHC card slot. The scanner allows data capture of option item values such as case number or patient number into the DSS audio file.

Compatible Barcode Formats:
EAN-8, EAN-13, EAN-128, UPC-A, UPC-E, Code39, Code93, Code128, Codabar, MSI, Interleaved 2 of 5, RSS-14, RSS-Limited, RSS-Expanded
Laser Class: 1
Code Length: Up to 30 digits
Working Range: Up to 25 cm or 10 inches
Scan Beam Deflection Angle: 80 deg
Dimensions: 50.6(W) x 67(H) x 16.6(D) mm (without protrusions)
Weight: 27g
IMPORTANT: The SC1 is a Class 1 Laser Product. Do not direct the beam in to eyes.
Please follow the steps below on setting up the SC1
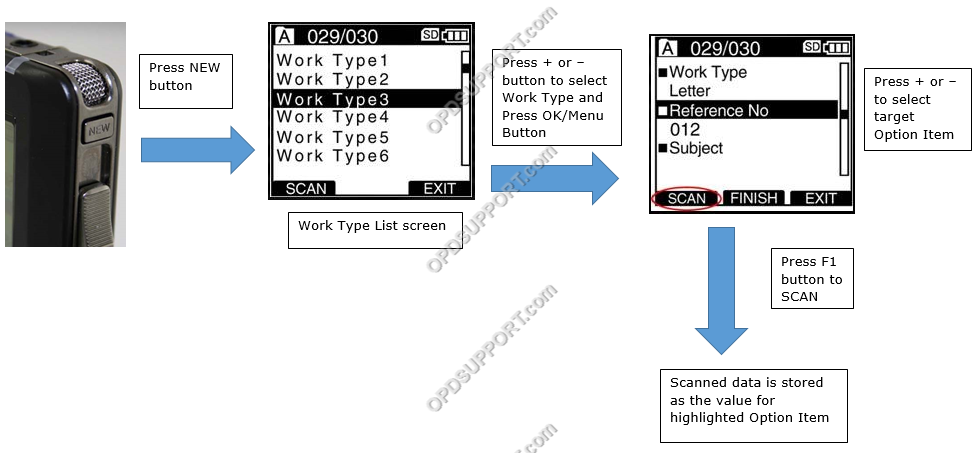
Worktype IDs
Worktypes are used to assign information to a Dictation. It is primarily used to categorise a dictation based on the subject matter of the recording.
…
Add Worktype IDs to a device
For this guide, Worktype IDs must have already been added to the Workflow section. See our Worktype IDs article for instructions.
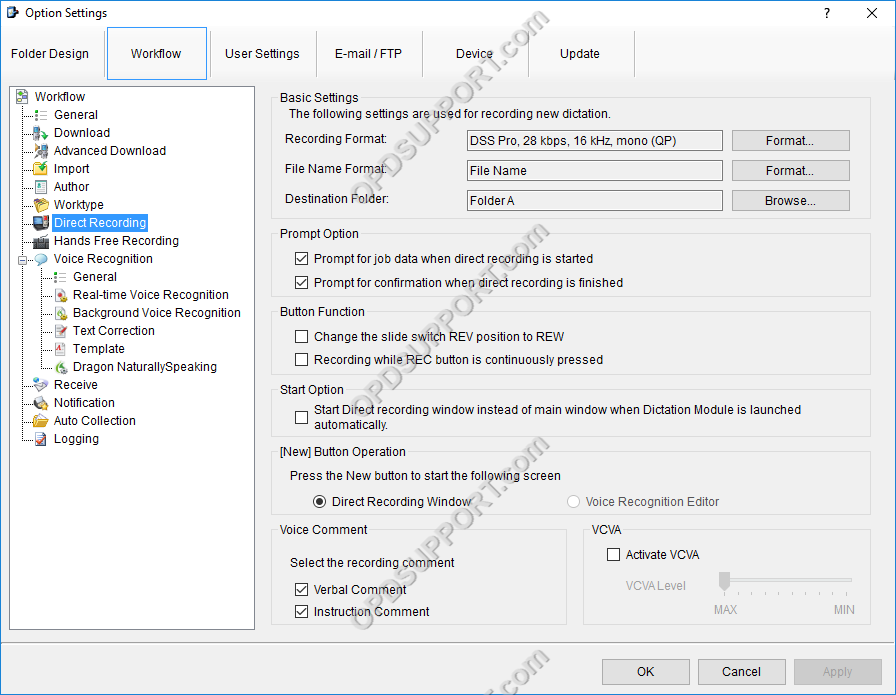
If you are using the RecMic DR-2300 you will need to configure the prompt for job data when direct recording. This will give you the opportunity to scan the barcode before proceeding to create dictations.
- Click on Tools -> Options -> Workflow
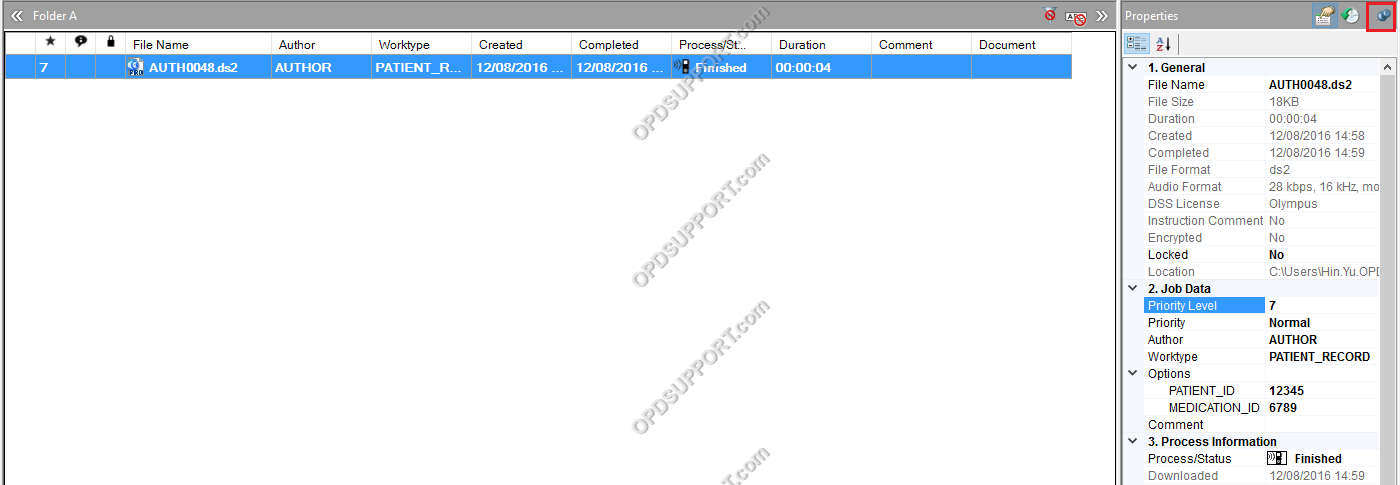
When dictation is downloaded, we want to see the data captured by the SC1. There are two way of displaying this data:
If you prefer to view option item labels in the Property Window then follow the steps below.
- To enable the properties window click on View then click on Property Window
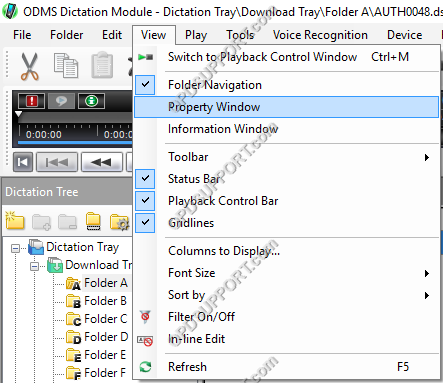
- To ensure the Property Window stays in the view by clicking on the pin to ensure it is down as shown below on the top right.
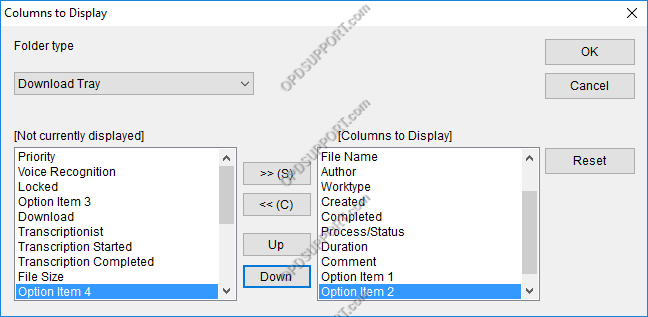
If you prefer to not view the option items label in the Property Window then you can set up the Columns to display more headers.
- Select the View drop down menu, then select Columns to Display.
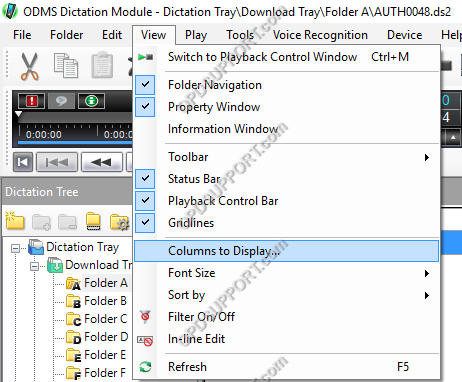
- Move the Option Item field(s) from the left to right using the >> (S) button.
- Then arrange the columns to suit your requirements. Click OK to confirm.
You will now see your new column headers which you can disable the Property Window by clicking on View -> Property Window or just leave it enabled.

- Remove SD card and insert SC1.
- Switch on the recorder
- The recorder will then prompt for option items. The F1 smart button becomes the SCAN button.
- The scan angle is approximately 80°which is perfect for almost every application.
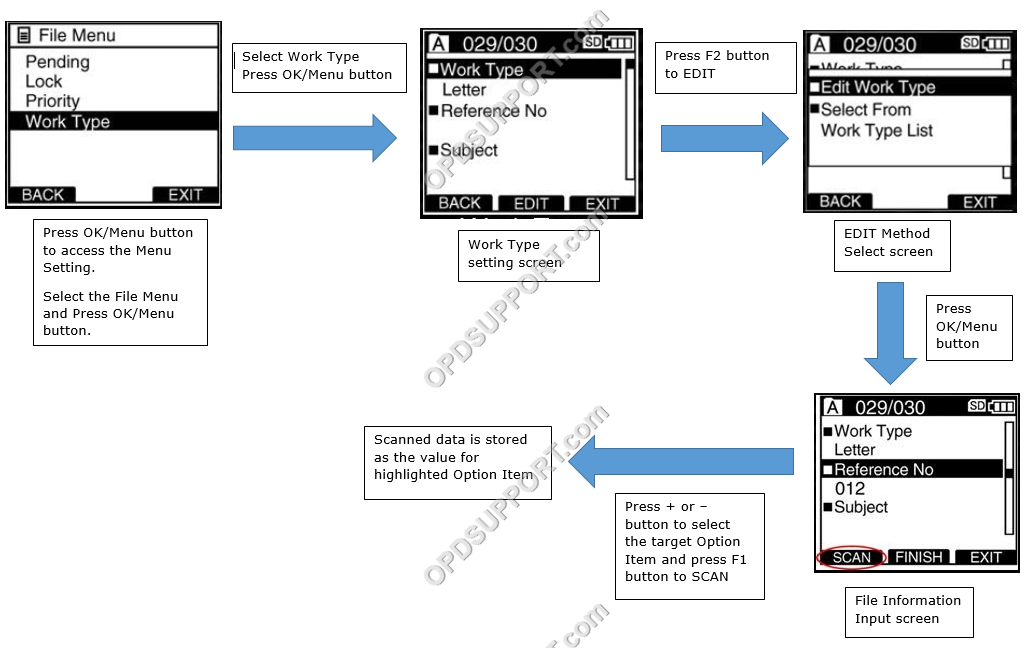
Process for New File
Process for Existing File
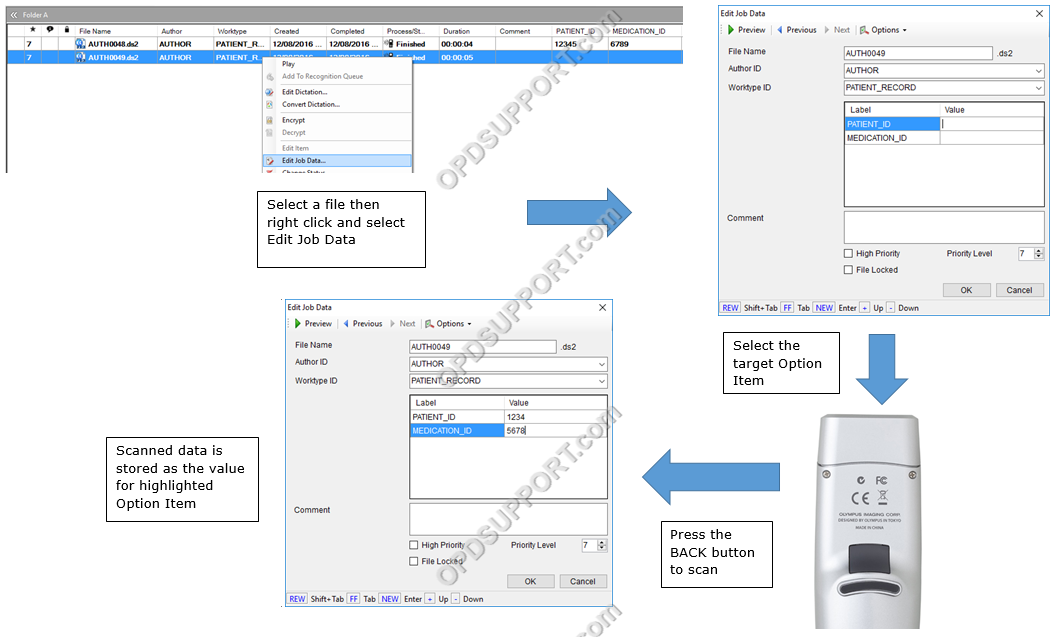
- Insert SC1 to the recorder
- The recorder will be used with the supplied software. The back button will become the scan button
- The scan angle is approximately 80°which is perfect for almost every application.
Process for New File
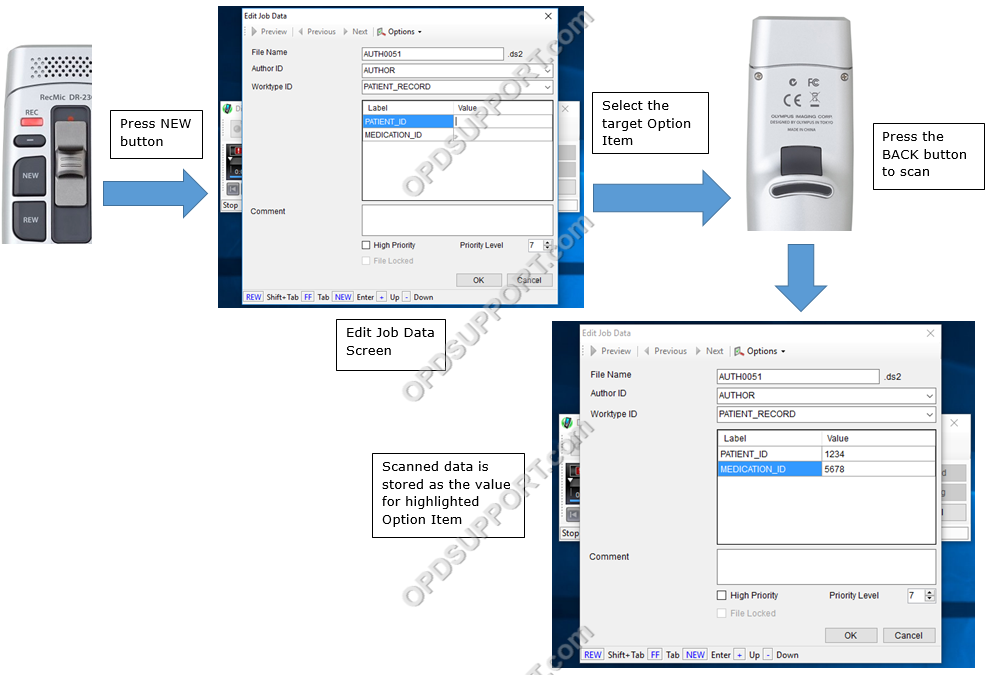
Process for Existing File